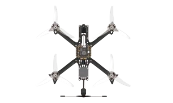
Ten parts decide how your drone flies. Here is what each one does, and what actually matters when you choose it.
A ready-to-fly quadcopter hides its parts from you. An FPV drone does not. You pick every component yourself, and each choice constrains the next one — a frame decides which propellers fit, propellers decide which motors make sense, motors decide how much current the speed controllers must carry.
That chain is why most first builds go wrong in the shopping cart rather than at the soldering iron. This page walks through all ten components in the order that decision chain actually runs.
The frame sets the size class of the whole aircraft, and size class is the single number that follows you through every other purchase. It is named after the propeller diameter it accepts: a 5-inch frame takes 5-inch props, a 3-inch frame takes 3-inch props.
Five inches is where most builders start, and for good reason. It carries enough mass to stay settled in wind, it is small enough to be agile, and the parts market is deepest there — replacement arms, matching stacks and propellers are all easy to find. Smaller classes are cheaper to crash but twitchier to fly and harder to see at distance.
Look at arm thickness before anything else. Arms take the impact in a crash, and a frame that uses a single thick arm plate replaced individually will cost you far less over a season than one that forces a full rebuild.
The flight controller runs the firmware that turns your stick movements into motor commands. It reads the gyroscope many times per second, compares what the aircraft is doing against what you asked for, and corrects the difference. Everything else on the drone plugs into it.
Betaflight is the standard firmware, and F7-class processors are the common choice for new builds — they leave headroom for the filtering and logging features that newer Betaflight versions rely on. Check the mounting pattern before you buy: 30.5×30.5mm is the usual spacing for 5-inch builds, and 20×20mm for smaller classes.
The FC and ESC are usually bought together as a stack — two boards that bolt on top of each other with a matching connector. Buying them as a stack removes the most common wiring mistake in a first build.
Brushless motors cannot be driven by simple voltage. They need their three wires energised in a rotating sequence, thousands of times per second, and that is the ESC's job. It takes a throttle signal from the flight controller and converts it into that sequence.
Modern builds use a 4-in-1 ESC: one board driving all four motors, sitting directly under the flight controller. It is lighter than four separate boards and dramatically simpler to wire.
The number that matters is the current rating in amps. It must exceed what your motors will draw at full throttle, with margin — an ESC running at its limit runs hot, and heat is what kills them. Read the rating as continuous current, not the burst figure printed larger on the box.
Four brushless motors, one per arm, is the standard quadcopter layout. Hexacopters and octocopters exist but are rare in FPV.
Two specifications describe a motor. The stator size is a four-digit number like 2207 — the first two digits are the stator width in millimetres, the last two its height. Bigger stators produce more torque and weigh more. The KV rating is revolutions per minute per volt applied: higher KV spins faster on the same battery, lower KV turns bigger propellers more efficiently.
KV has to be matched to battery voltage, and this is where beginners most often get it wrong. A motor chosen for a 4-cell pack will over-rev on a 6-cell one. For 5-inch builds on 6S batteries, 2207 or 2306 stators in the 1700–1900KV range are the common pairing.
Propellers convert rotation into thrust. Three numbers describe them: diameter, pitch, and blade count. Diameter must match the frame. Pitch is how far the propeller would advance in one rotation through a solid medium — higher pitch trades acceleration for top speed. Blade count trades efficiency for grip; three blades is the usual compromise for freestyle and racing.
Propellers are also handed. Two spin clockwise, two counter-clockwise, and installing one the wrong way round produces a drone that flips itself on takeoff. Every propeller is marked; check the marking, not the shape.
Propellers are consumable. Buy them in sets of at least ten with your first build — you will go through them faster than any other part.
The camera is what makes it first-person view. It feeds live video to your goggles so you fly from the aircraft's perspective rather than watching it from the ground.
The split is analog versus digital. Analog cameras are cheap, essentially latency-free, and degrade gracefully — the picture gets noisy at range rather than freezing. Digital systems give a far cleaner image but usually come as a matched camera-and-transmitter set from one manufacturer, which locks you into that ecosystem and costs more.
Latency matters more than resolution here. A sharper picture that arrives late is worse to fly than a soft one that arrives instantly.
The VTX broadcasts the camera feed to your goggles. Its output power, measured in milliwatts, sets how far that signal carries — and it is regulated. Legal power limits and permitted frequency bands differ by country, and 5.8GHz transmission in particular may require an amateur radio licence depending on where you fly.
Heat is the practical concern. A VTX transmitting at full power with no airflow will overheat, and many will damage themselves if powered up without an antenna attached. Never arm a VTX without its antenna connected.
Antennas turn electrical signals into radio waves and back. Your drone carries one on the VTX; your goggles carry one or more on the receiver side. Both ends matter equally — an excellent transmitter with a damaged antenna performs worse than a modest one with a good antenna.
Polarisation has to match between the two ends. Circular polarisation is standard in FPV because it tolerates the constant changes in aircraft orientation far better than linear polarisation does. Antennas are also fragile: they take impacts on crashes, and a bent or cracked one should be replaced rather than straightened.
The receiver picks up control signals from your transmitter and passes them to the flight controller. Unlike a ready-to-fly drone, an FPV build has no pairing done for you — you bind the receiver to your transmitter yourself, and the two must speak the same protocol.
ExpressLRS (ELRS) has become the default recommendation for new builds. It is open source, low latency, long range, and widely supported across transmitter brands. The important thing is that the receiver protocol matches your transmitter — a receiver of one protocol will not bind to a transmitter of another, regardless of frequency.
FPV drones run on lithium polymer (LiPo) packs, chosen for the amount of current they can deliver relative to their weight. Three numbers describe a pack: cell count (written as 4S, 6S and so on), capacity in milliamp-hours, and C-rating.
Cell count sets voltage, which must match what your motors and ESC expect. Capacity sets flight time, but heavier packs cost you performance, so bigger is not automatically better. The C-rating describes how fast the pack can discharge safely — multiply it by capacity to get the maximum continuous current draw.
LiPo packs are the one component on this list that can injure you. They should be charged on a balance charger, never left charging unattended, stored at around 3.8V per cell rather than full, and retired once a cell swells. Treat a puffed pack as waste, not as a battery with less capacity.
These are the common pairings for a first 5-inch build, not the only correct ones. Use them as a starting point to compare against, then adjust for what you actually want to fly.
| Component | Common first choice | Why |
|---|---|---|
| Frame | 5-inch, replaceable arms | Deepest parts market; cheap to repair |
| FC + ESC | F7 stack, 30.5×30.5mm | Bought together; removes wiring guesswork |
| Motors | 2207 or 2306, 1700–1900KV | Matched to 6S voltage |
| Propellers | 5-inch tri-blade, buy 10+ | Consumable; balance of grip and efficiency |
| Receiver | ELRS | Open source, long range, broad support |
| Battery | 6S LiPo, balance charger | Charger is not optional |
Budget for the airframe alone — excluding radio, goggles and batteries — commonly lands in the low hundreds of US dollars as of 2026, and a first build including setup and testing typically takes a working day rather than an evening. Both figures move with component choice, so treat them as scale rather than a quote.
Read back through the list and the pattern is hard to miss. Frame size constrains propellers. Propellers constrain motors. Motor KV has to agree with battery cell count. Motor current draw sets the ESC rating. Receiver protocol has to match the transmitter you already own.
Almost every expensive first-build mistake is one of those links broken — parts that each look correct on their own product page and do not work together. Decide the size class first, then work down the chain in order, and check each purchase against the one before it.
Where this comes from. FPV Drone Essentials takes the ten components in this order across pages 38 to 256 — frame 38, flight controller 64, speed controller 84, motor 106, propeller 120, receiver 134, battery 158, then the FPV system: camera 196, video transmitter 218, antenna 236. Each section ends with a selection page, which is the part worth reading with a shopping cart open.
This page covers component selection. FPV Drone Essentials covers the whole path — parts, assembly, Betaflight configuration and flight training — with the detail a single page cannot hold.
Buy on Amazon